Navigating the depths of your laptop’s BIOS and boot menu might seem like a daunting task reserved only for the tech-savvy elite. But trust me, it’s a skill that comes in handy and is easily learned.
In this blog post, we’re zooming in on new Lenovo laptops and showing you the simple steps to accessing the boot menu. Whether you’re troubleshooting, optimizing your system, or just genuinely curious, this guide is for you.
Why Access the Boot Menu?
Accessing the boot menu on your Lenovo laptop is like opening the door to a world of possibilities. But why would you ever need to knock on this particular door? Is it worth your time? Well, let’s start by understanding what the boot menu is and how it serves you.
The Importance
The boot menu is essentially a launching ground from which you can boot different operating systems or utilities, as opposed to just booting your primary OS. This is crucial if you’re trying to run a live Linux distribution, recover from a backup, or fix Windows issues from a USB stick.
Applications
- Installing a New OS: Are you an aspiring Linux aficionado? Boot from a USB stick containing a Linux distro to try or install it.
- System Recovery: If Windows goes rogue, you can boot from a recovery drive to set things right.
- Hardware Testing: You can boot into a hardware diagnostics tool to check if everything’s working perfectly.
Preparation Process
Okay, so you’ve decided to go down the rabbit hole and explore the boot menu. But wait! Before you take the plunge, let’s make sure you’re prepared with all the essential prerequisites.
Backup Your Data
The boot menu itself is a pretty safe space; however, the operations you might perform post-entry could jeopardize your data. Always ensure that you have a recent backup of all essential data, just to be on the safe side.
Tools You’ll Need
- A USB Drive: For booting alternative OS or recovery tools.
- Laptop Charger: It’s wise to keep your laptop plugged in to avoid the system shutting down mid-process.
BIOS vs UEFI
Modern Lenovo laptops are more likely to use UEFI (Unified Extensible Firmware Interface) rather than the older BIOS (Basic Input/Output System). The terms are often used interchangeably, but it’s essential to know the difference when looking for instructions specific to your system.
The Basic Steps

With the preliminaries out of the way, it’s time for the main event: entering the boot menu on your Lenovo laptop. While the process is generally simple, there are some variations based on the specific model you have.
Step-by-Step Guide for UEFI Systems
- Turn Off Your Laptop: Start with a clean slate.
- Power On: Press the power button to turn on your laptop.
- Access Boot Menu: As the system starts, press the boot menu key repeatedly. For most Lenovo laptops, it’s the F12 key.
- Select Boot Device: Once in the menu, use the arrow keys to select the desired device and press Enter.
Step-by-Step Guide for BIOS Systems
- Turn Off Your Laptop: Yep, same first step.
- Power On: Hit the power button.
- Access Boot Menu: Press the F12 key or the specified key for older systems as your laptop starts.
- Select Boot Device: Use arrow keys to navigate and select your device.
Common Issues and Troubleshooting

So you’ve followed all the steps but hit a roadblock? Don’t worry; troubleshooting is a natural part of the process. Let’s take a look at common issues and how to resolve them.
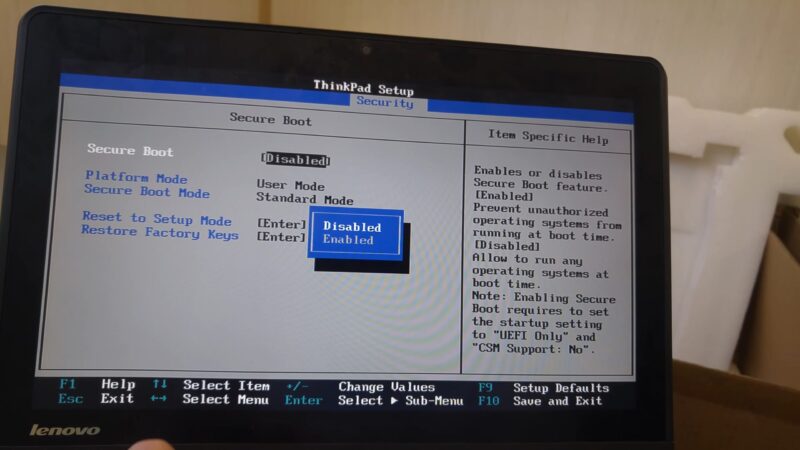
Secure Boot
Secure Boot is a security feature that prevents unauthorized code from booting on your laptop. To boot from external media, you might need to disable Secure Boot in the BIOS settings.
Fast Boot
Fast Boot can bypass the time window for pressing the boot menu key. Disable Fast Boot temporarily to make your life easier.
Unrecognized Boot Device
- Check USB Formatting: Make sure your USB drive is formatted correctly, often as FAT32.
- Update BIOS: Outdated BIOS could cause issues. Update it but proceed with caution, as this is an advanced task.
Bonus: Advanced Customizations and Beyond
Just when you thought we were done, there’s more! For those of you who like to push boundaries and explore the potential of your Lenovo laptops further, let’s delve into advanced customizations and tweaks that could give you even more control and functionality.
Using Boot Configuration Data (BCD) Editor
The BCD Editor is a powerful tool on Windows that allows you to control various boot settings right from the operating system. You can use it to set a countdown for the boot menu display, set default boot loaders, and more. But proceed cautiously, as incorrect settings can lead to boot issues.
How to Access BCD Editor
- Run Command Prompt as Admin: Type cmd in the Windows search bar, right-click on it, and select ‘Run as administrator.’
- Enter BCD Edit: Type bcdedit and press Enter. You’ll see various settings, including the boot menu display time.
Tweaking Settings
- To set the boot menu display time to 10 seconds, for example, type bcdedit /timeout 10 and press Enter.
- You can also disable the boot menu with bcdedit /timeout 0. Caution: Use this only if you’re sure, as it will directly boot to the default OS.
Leveraging GRUB for Dual Booting
For the Linux enthusiasts among you, GRUB (GRand Unified Bootloader) offers even more customization when dual-booting between Linux and Windows.
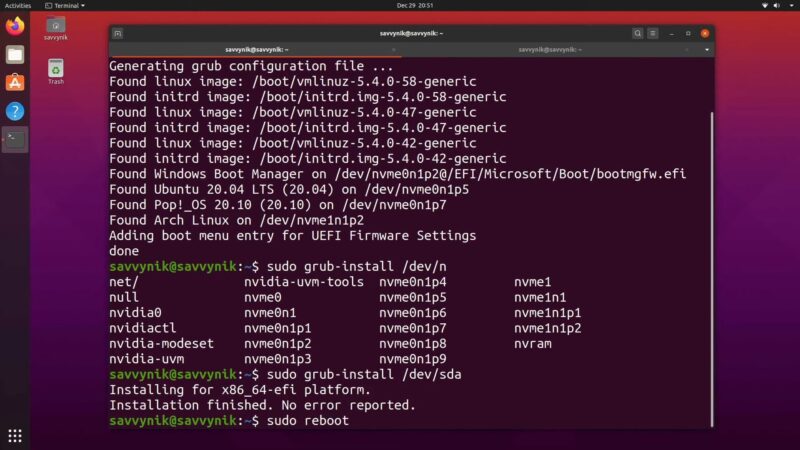
Installing GRUB
- Download: While installing Linux, it usually offers to install GRUB as well. Choose to do so.
- Configuration: After the Linux installation is complete, reboot, and you’ll see the GRUB menu offering a choice between Linux and Windows.
Customizing GRUB
- You can modify the /etc/default/grub file in Linux to change GRUB settings. Always backup the original file before making changes.
- You can set the default OS, menu timeout, and even the menu’s graphical interface.
Recommended Tools and Utilities

If you’d like to enhance your experience and arm yourself with some excellent tools for managing your boot settings, here are some recommendations.
EasyBCD
This is a great tool for managing boot entries. It offers a user-friendly interface for editing boot settings that would otherwise require command-line tweaks.
Features
- Add new boot entries for additional operating systems.
- Backup and restore boot settings.
Rufus
An invaluable tool for creating bootable USB drives. It’s easy to use and supports a variety of file systems and OS distributions.
Features
- Create UEFI or BIOS-compatible boot drives.
- Supports a range of file systems, including FAT32, NTFS, and more.
Final Words
And there you have it! A comprehensive guide to entering the boot menu on new Lenovo laptops. From understanding the importance of the boot menu to troubleshooting issues, you are now well-equipped to dive deep into your system’s underbelly. Feel free to bookmark this guide and return to it whenever you need. Safe travels through the digital landscape!